Garage Door Remote Programming and Keypad Repair: The Complete Guide
Almost every remote and keypad problem is one of four things: a battery, a lost pairing, a misaligned sensor being blamed on the remote, or an opener that is genuinely on its way out. Working out which one you have takes about five minutes, and three of the four you can fix from a stepladder without spending anything.
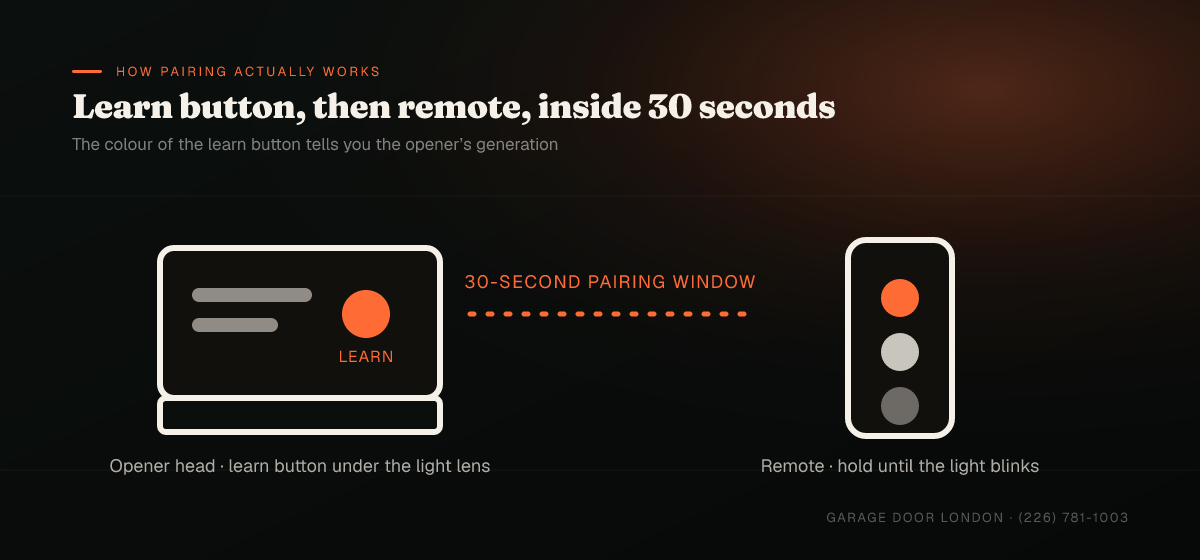
To program a garage door remote: press the learn button on the opener head (usually under the light lens), then within 30 seconds press and hold the remote button until the opener light blinks or you hear a click. For a keypad, press learn, then enter your 4-digit PIN and press Enter within the same window. If a keypad has stopped working entirely, replace the 9V or coin battery first — that is the cause in the large majority of London call-outs. Programming and keypad repair costs $0 to $190 depending on whether parts are needed.
How garage door remote pairing actually works
Every modern opener uses the same basic idea. The motor head holds a small memory of authorised transmitters. Pressing the learn button opens that memory for about thirty seconds; anything that transmits during that window gets written in. Close the window and the opener ignores everything it does not already know.
Two details matter. First, the learn button is almost never on the outside — on most units you lift or remove the light lens on the motor head to find it. Second, its colour tells you the generation of rolling-code security, which in turn tells you which replacement remotes will work.
| Brand | Learn button colour | Technology | Roughly |
|---|---|---|---|
| LiftMaster / Chamberlain / Craftsman | Green or red-orange | Billion Code / Security+ | 1993 – 2005 |
| LiftMaster / Chamberlain / Craftsman | Purple | Security+ 315 MHz | 2005 – 2011 |
| LiftMaster / Chamberlain / Craftsman | Yellow | Security+ 2.0, 310/315/390 MHz | 2011 onward |
| Genie / Overhead Door | Round black or blue “Program” | Intellicode / Intellicode 2 | 1995 onward |
| Marantec | Blue or grey | Multibit / Digital 3-button | 1998 onward |
| Linear / Multi-Code | Small recessed learn | MegaCode | Varies |
| Skylink | Learn / Code button | Rolling code | Varies |
Match the colour before you buy a replacement remote. A yellow-button opener will not accept a purple-era transmitter, and this is far and away the most common reason a brand-new remote “does not work”. If your opener has no learn button at all, it predates rolling code entirely — look for a bank of small DIP switches inside the remote and inside the motor head, and set both to matching positions. Any opener that old is worth reading our opener replacement guide about.
How to program a garage door remote, step by step
This works for the great majority of openers sold in Ontario. Have the stepladder set up before you start — the thirty-second window is short and there is no penalty for missing it, but it is irritating.
- Get the opener light lens off. On most LiftMaster and Chamberlain units the lens hinges down or slides off. On Genie units the learn button is usually behind a small panel on the back or side of the motor head.
- Find the learn button and note its colour. There will be an LED next to it. Do not hold the button down for more than a couple of seconds at this stage — on most units, holding it for six to ten seconds erases every paired device.
- Press and release the learn button. The LED will light steadily or begin to blink. You now have about thirty seconds.
- Press and hold the button on the remote you want to pair. Hold it for two to three seconds.
- Watch for confirmation. The opener light will flash, or you will hear a single click from the motor head. That is the pairing written.
- Test it. Step back and press the remote. The door should move. If nothing happens, repeat from step 3 — the window most likely expired.
- Repeat for every remote and vehicle button you want on the door. Most openers hold five to eight transmitters.
You have no way of knowing how many remotes were programmed to a door before you got the keys, or who still has one. Hold the learn button until the LED goes out — usually six to ten seconds — to wipe every paired transmitter, then re-pair only your own. It takes two minutes and it is the single most useful security step a new London homeowner can take.
Programming a car's built-in buttons (HomeLink and Car2U)
Built-in visor buttons work slightly differently. Modern rolling-code openers cannot simply be taught to the car — the car has to be trained by the remote first, and then the opener has to accept the car. The sequence is: hold the two outer visor buttons to clear the car’s memory, hold your working remote an inch or two from the visor button while pressing both until the car’s indicator flashes rapidly, then press the learn button on the opener and press the visor button up to three times. On Security+ 2.0 (yellow learn button) openers a HomeLink repeater bridge is sometimes needed — if your vehicle predates about 2012 and the opener is newer, that is usually the missing piece.
How to program or reset a wireless keypad
A keypad pairs the same way as a remote, with the PIN standing in for the button press.
- Choose a 4-digit PIN. Avoid the house number and avoid 1234 — a keypad is on the outside of your home and is worn enough after a couple of years that the four used keys are visible.
- Press and release the learn button on the opener head.
- Within 30 seconds, enter the PIN on the keypad and press Enter. Some Genie and Overhead Door keypads want the PIN entered, then Program, then Enter.
- The opener light flashes or clicks. The PIN is stored.
- Test it twice — once to open, once to close.
To change an existing PIN on most LiftMaster and Chamberlain keypads, enter the current PIN, hold Enter for about six seconds until the keypad light flashes, then enter the new PIN and press Enter. On Genie units it is generally quicker to re-pair from scratch.
Temporary PINs and lock-out
Most keypads made in the last decade support a temporary PIN with a set number of uses or a time limit, which is genuinely useful for trades, dog walkers or a cleaner. The same units usually have a lock-out mode that disables all remotes and keypads while you are away — worth setting before a holiday. Check the model number on the back of the unit against the manufacturer’s manual; the sequences vary more than the basic programming does.
Why a garage door keypad stops working — and how to fix it
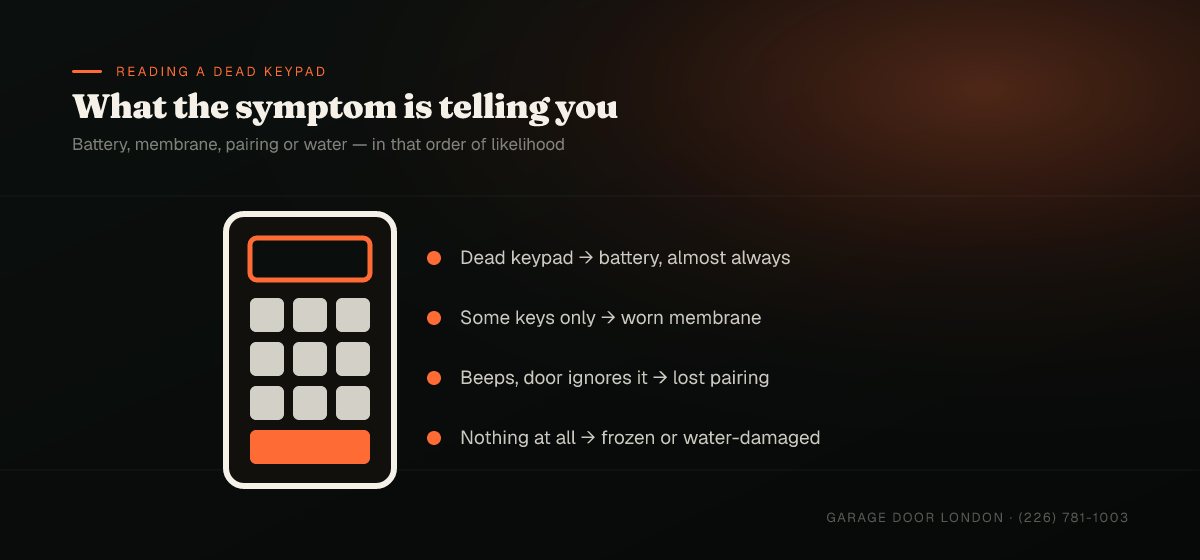
Keypads live outdoors, on a wall, through London winters. They fail in four recognisable ways, and the symptom points straight at the cause.
| Symptom | Most likely cause | Fix | Typical cost |
|---|---|---|---|
| Completely dead, no backlight | Flat battery | Replace the 9V or coin cell | $5 – $15 |
| Some keys work, others do not | Worn or cracked keypad membrane | Replace the keypad | $70 – $140 installed |
| Beeps and lights up, door ignores it | Lost pairing with the opener | Re-program the PIN | $0 – $95 |
| Works intermittently in cold | Battery weak, or moisture in the housing | New battery, reseal the backplate | $5 – $95 |
| Works up close, not from the car | Weak transmitter or antenna damage on the opener | Check the hanging antenna wire | $0 – $150 |
| Door starts then reverses | Not the keypad — photo-eye sensors | Realign or clean the sensors | $0 – $130 |
| Nothing at all, opener also unresponsive | Opener logic board or power | Opener diagnosis | $150 – $400 |
Start with the battery, every time
It sounds too simple, but a flat battery is the cause in most keypad calls we take. Keypad batteries typically last two to three years and they fail fastest in cold weather, which is why the calls cluster in January. Open the housing, check the contacts for green corrosion, clean them with a pencil eraser if you find any, and fit a fresh battery. If the backplate seal is perished, replace the whole unit rather than fighting it — water ingress will keep coming back.
When the keypad is not the problem
A door that starts to close from the keypad and then reverses is not a keypad fault at all. That is the safety photo-eyes doing exactly their job, and it is fixed at the sensors — our safety sensor guide walks through alignment. Similarly, if the door responds to the wall button but to nothing wireless, the problem is the opener’s receiver or antenna, not any of your transmitters. Our opener not working guide covers that split, and opener repair is the service page.
Security, interference and the questions people actually ask
Three practical issues come up constantly, and none of them are obvious.
Rolling code is not optional any more
Openers from before roughly 1995 used a fixed code set by DIP switches, which meant a limited number of possible combinations and no protection against code capture. Everything since uses a rolling code that changes with every press. If your opener still has DIP switches in the remote, that is a security consideration as much as a convenience one — and it is a good part of why replacement often makes sense on a unit that age.
Interference is real, and usually fixable
- LED bulbs in the opener. Cheap LED lamps throw radio noise across exactly the band openers use. If your remote range collapsed right after a bulb change, that is why — fit a bulb rated for garage door openers.
- The antenna wire. A short wire hangs down from the motor head. It should hang free and straight, not be coiled, taped up or tucked into the housing.
- Distance and obstructions. Metal-clad doors, brick and a car parked between you and the garage all attenuate the signal. Range dropping gradually usually means a weak remote battery.
- Nearby transmitters. Occasional interference from other equipment on the same band; changing the opener frequency band (on Security+ 2.0 units, it hops automatically) usually solves it.
Should you keep a remote in the car?
Not clipped to the visor of a car parked on the driveway, no — a visible remote plus a registration document with your address is an obvious pairing. Keep it in a pocket, use the vehicle’s built-in HomeLink buttons, or use a keypad and no remote at all. If a remote goes missing, wipe the opener memory and re-pair the rest; it takes two minutes and it is why the erase step matters.
When to call rather than keep trying
Programming is genuinely a homeowner job and we are happy to talk anyone through it on the phone. Call for service when the opener does not respond to the wall control either, when the motor hums without moving, when the light flashes a repeating code, or when the door reverses partway with no obstruction — those are opener and safety-system faults rather than transmitter faults. We cover opener repair across London, Byron, Hyde Park, White Oaks and the surrounding area, and if the whole unit is past sensible repair, belt vs chain drive is the right next read. Get a flat-rate quote any time.
Get a flat-rate price in minutes
Frequently asked questions
Press and release the learn button on the opener head — usually under the light lens — then within 30 seconds press and hold the button on the remote until the opener light flashes or the motor clicks. Test it from the driveway. If nothing happens, the 30-second window expired; start again.
On most LiftMaster, Chamberlain and Craftsman units it is on the motor head behind the light lens, beside the hanging antenna wire. On Genie and Overhead Door units it is generally behind a small panel on the back or side of the motor head.
It identifies the rolling-code generation. Green or red-orange is Billion Code and Security+ from about 1993 to 2005, purple is Security+ 315 MHz from 2005 to 2011, and yellow is Security+ 2.0 from 2011 onward. Replacement remotes must match the generation.
Press and release the learn button on the opener, then within 30 seconds enter your four-digit PIN on the keypad and press Enter. Some Genie and Overhead Door keypads want the PIN, then Program, then Enter. The opener light will flash to confirm.
A flat battery is the cause in most cases — keypad batteries last two to three years and fail fastest in cold weather. If it lights up but the door ignores it, the pairing has been lost and it needs reprogramming. If only some keys respond, the membrane is worn and the keypad needs replacing.
A new battery is $5 to $15 and you can fit it yourself. A replacement keypad installed and programmed runs $70 to $140. Reprogramming alone on a service call is $0 to $95. If the opener's receiver is at fault rather than the keypad, diagnosis and repair is $150 to $400.
Press and hold the learn button until the LED goes out, usually six to ten seconds. That wipes every paired remote, keypad and vehicle button. Re-pair only the transmitters you want. This is worth doing the day you move into a house.
Usually a weak remote battery. If the range dropped suddenly rather than gradually, check whether an LED bulb was recently fitted in the opener — cheap LEDs emit radio noise on the same band. Also check that the antenna wire hangs free from the motor head rather than being coiled or taped up.
Yes. Clear the car's memory by holding the two outer visor buttons, then hold your working remote near the visor button while pressing both until the indicator flashes rapidly, then press the learn button on the opener and press the visor button up to three times. Vehicles older than about 2012 paired to a Security+ 2.0 opener may need a HomeLink repeater bridge.
No. That is the safety photo-eye sensors reversing the door, which is exactly what they are designed to do. Clean both lenses, check that nothing is breaking the beam, and realign the sensors until both LEDs glow steadily.
What we put in writing
A fixed price before we start. The full price in writing after the diagnosis and before any work begins. Find something unexpected once the door is open and we stop and re-quote rather than adding it to your bill.
A written warranty. Lifetime on the parts we supply and five years on our labour, printed on the invoice rather than promised at the door.
A safety test before we leave. Balance, cables, drums, opener force and travel limits, and the auto-reverse tested against an obstruction — recorded on your invoice with the date.


